A router will round an edge, cut a groove or form a decorative profile in a matter of minutes. But it can also be the first time that you pick up one up that it can feel scary. A lot of spinning is to be expected, so getting it right from the beginning is very important.
This is a tutorial to get you acquainted with the use of a router in a simple and practical manner. You will be familiar with parts, safety rules, bit choice and feed direction and what causes cuts to fail. Knowing how to use a router properly, clean and safe results will come much easier.
What is Router and What does the Router do?
A machine used for cutting at high speed, which spins a cutting tool. The bit is used in a device called a “collet. The tool is moved over the wood and as it moves, the bit removes material.
A router is a tool that is used by woodworkers in a wide variety of applications:
- Smoothed or chamfered edges.Rounded or chamfered corners.
- Grooving, dadoing and rabbeting.
- Making decorative edge profiles
- Installing laminate or edge banding that is flush.
- Making cuts for hinges
These uses are just a few of the many uses for learning how to use a router. An “all-in-one” tool may be able to perform the functions of multiple hand tools.
Beginners’ Router Types
There are several different types of routers. Each of them has a unique personality.
- Fixed-base router: The bit depth is set at the beginning of the program. Simple and effective to use, for edges.
- Plunge router – the motor plunges into the wood on spring loaded posts. It can be used for grooves, mortises and centre started cuts.
- Compact (trim) router: A lightweight and small router. Easy to use for one handed trimming and light edge work.
- Inverted Router: A special table attachment is used to hold the router, which is turned upside down. It is not the bit that moves the wood, but the wood that moves through the bit.
The compact (fixed base) model is a friendly starting point. It’s not so heavy and hard to handle when you get proficient.
Safety Equipment and Rules Prior to Beginning
To use a router safely is an integral element of the process. Follow these rules when playing:
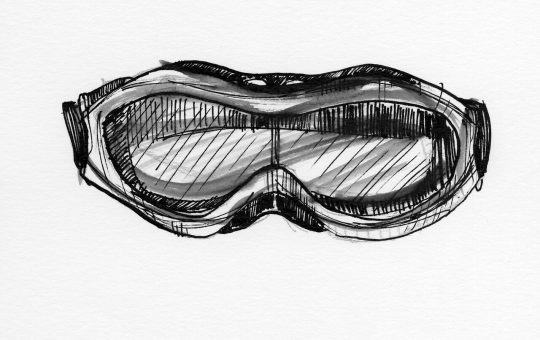
- Wear safety glasses. Chips and dust are fast-moving.
- Use hearing protection. Routers are loud.
- Wear a dust mask. Lungs do not like the small pieces of wood.
- No loose sleeves, gloves or jewelry. These may be picked up in a spinning bit.
- Unplug the router from the electricity wall socket before removing or replacing the bit or changing the collet.
- Clamp your workpiece. Don’t use your hands to hold small pieces.
- Use two hands to grasp the router.
- Be sure that the cutting line doesn’t cross the cord.
Also consult the manual for your router. There are details and limits to each model.
How to Choose the Right Router Bit
The type of bit will dictate the shape of the cut. There are a number of simple types to choose from:
- Straight bit (groove bit): Used for making grooves and dados.
- Rounded over edge: Curve made where there was a sharp edge.
- Chamfer bit: A bit that has the ability to cut an angled edge.
- Flush trim bit, has a bearing that follows the edge or template, to cut a piece just like another piece.
- Rabbeting bit: Makes a step on an edge.
Don’t forget to check the size of the shank. 1/4″ and 1/2″ are the most common sizes. The shank of the collet in your router should be the same size as your shank. The thicker the shank, the less vibration, and 1/2 inch is thicker.
Carbide tipped bits stay sharp for a longer period than steel bits. A sharper bit will bite down quicker and will need less pushing to bite. One of the most important steps in well use of a router is the selection of the right bit.
Step by Step Router Setup
Place the tool properly prior to its activation.
- Unplug the router. Prior to touching the collet.
- Insert the bit. Insert shank completely into the collet, then withdraw it approximately 1/8 inch. Avoids allowing bit to touch the ground.
- Tighten the collet. Use the wrench. Do not tighten collet without a bit in it.
- A shallow depth should be used. Move base up or down as directed by the instructions in the model. Start light.
- Clamp the wood. There is no movement of the work piece. Allow for movement of the router.
- Set the speed. For routers with a speed dial, bigger bits typically require slower speeds. Follow the packaging of the bit for instructions.
- Check the area. Collect up all the debris and place the cord behind.
Why the first cut is the best cut!
Work on scraps of wood first in the beginning. Follow these steps, then:
- Set the router base down on the wood, but not touching the edge.
- Connect and power on the router.
- When approaching the wood, let the bit accelerate to maximum speed before it makes contact with the wood.
- Feed the bit slightly forward (into the work piece).
- Run continuously at the same pace. Make sure that the base is flat and that the pressure is carried evenly.
- Continue to move until the cut is finished, and lift the router up.
- Turn off the router. Never leave the bit until it has come to a complete stop.
Play music and watch while working. Burn marks indicate that you may be operating at too slow of a speed, or that the bit is dulled. If there is ongoing strain, it is likely that the cut is too far. This is the concept behind controlling the router.
Feed Direction: Use of the router in a safe way
The bit spins clockwise when you look down from above. The way the wood is pushed into the router should be such that the cutting edge is moving into the wood.
Outside edges: Router is spinning in the opposite direction to the work.
With an opening in a template: Router clockwise.
This is referred to as a “conventional cut.” It provides you with control.
A climb cut is when you’re going the other direction. The bit is able to catch the wood and drag the router ahead. The beginner should not go for the climb cuts. There’s one rule to keep in mind when learning how to use a router and it is quite important.
Take Shallow Passes
Do not do a single pass to full depth. Deep cuts will overwork the motor, burn and rip the wood.
Make multiple light strokes with grooved if grooves are deep. Decrease the bit one step at a time. Most woodworkers work passes that are about 1/8 to 1/4 of an inch deep, and are lighter in hard wood or larger bits.
Light passes also leave a smoother edge and are controlled easier.
Common Beginner Mistakes
Most issues are due to a few bad habits. When learning how to use a router, make sure to stay away from these:
- Taking the “scrap test. Run the depth test and shape test on unused wood.
- Cutting too deep. Have fun taking light passes.
- Using a dull bit. It attracts wood, roughens edges of leaves.
- Feeding in an improper manner. Never step on the cutting line for each cut.
- Inability to clamp work. Wanders motioning boards can be dangerous.
- Stopping mid-cut. Having the bit in one place can cause burning of the wood.
Cleaner Cuts tips:
Little things go a long way in terms of the quality of the finish.
- Keep bits clean. Although resin is safe to handle, use a small amount of cleaner to wipe down if well built-up can burn.
- Try it out on a scrap of the same wood.
- Cut end grain and then long grain edges. The final pass removes corner chip-out.
- Use a straight edge or edge guide for straight lines.
- If you have a router which will accept dust collection, hook it up. You will be able to see your line more clearly.
- Avoid overtaking and changing speeds during the race.
How to use a router is much trickier with these habits.
Simple Practice Projects
These are some suggestions to try to practice using a router with small, low-risk pieces:
- Round out the corners of a scrap board.
- Using a test piece, cut a straight groove.
- Make a rabbet cut on a side of a board.
- To cut off a bit square, use a flush trim bit.
Preserve your test pieces. Write the bit and depth on each of them so that they can be repeated later when they get a hit.
Basic Care and Maintenance
The better the router the safer it is and the more it cuts!
- Never clean when plugged in.
- Sweep vent and base for brush dust.
- Check collet for wear and dirt.
- Keep pieces of paper out of the way, to prevent the cutting edges from colliding.
- Change or sharpen dull parts.
Final Thoughts
The most important thing about learning how to use a router is learning some habits. Feed against the bit’s rotation, wear your safety gear and clamp your work. Use a sharp bit, and take light passes.
Start small. Practise on waste / scrap material, know what each setting does to the cut and slowly ramp up the challenge. Be patient and you will obtain clean edges and clear confidence. Using the knowledge you now have about the safe operation of a router, use a simple project to begin cutting!
FAQs
How to use a router Facing a challenge with learning the skills of your router?
Not usually. This is a relatively simple tool, and the main skills are the ability to keep the tool steady and to use the proper feed direction. Use scrap wood, make shallow passes and progress to real projects.
Which one is the best router for a novice?
For the beginner a compact or fixed base router is a good option. Easy to carry and convenient to use. Select a model which is affordable and suitable for the size of the bits to be used.
In what direction should I move a router?
Push it in the direction of rotation of the bit. If it’s an outside edge, it’s typically clockwise around the piece. Do clockwise cuts if they are to be done in the inside.
What’s the correct depth to bevel on a router?
Go shallow. A lot of woodworkers use passes that are 1/8 to 1/4 of an inch depending on the wood involved, the bit size and the power of the router. For deeper cuts, make additional passes.
Is it possible to use a router without a router table?
Yes. Many jobs, such as edge profiles and grooves, can be done with a handheld router. The router table is helpful for small parts and repeat cuts, but can be an optional item.