One of the oldest methods of joining wood is the mortise and tenon joint. It has been used for centuries in wood furniture pieces such as chairs, tables, doors and bed frames.
If you wanted furniture that has a long life, it’s a skill that’s worth learning. This guide will cover how to create a mortise and tenon joint from mark to clamp. In addition, you will find out what are the primary kinds, the devices required, and the blunders to steer clear of.
So what is a Mortise and Tenon Joint?
A mortise is a hole cut into a piece of wood in a rectilinear shape. A matching tongue forms at the end of another piece, it’s called a tenon. The tenon is inserted into the mortise and adhered to, thus holding the two parts together.
This joint is strong due to the large surface area of the glue. That surface is predominantly long grain, making wood glue bond easily. The shape also makes it less prone to twisting and racking.
What are the advantages of Mortise and Tenon Joints in Furniture?
Every day furniture is under stress. Humans press on tables and lean on them, push on frames, etc. A mortise and tenon joint is more efficient at resisting these forces than a butt joint with a single glue joint.
Here are the reasons many woodworkers prefer it to:
- Provides extensive glue contact surface for the two components.
- The tenon is placed inside the mortise and will resist lateral loads.
- It’s ideal for table legs, aprons, chair frames, bed rails and doors.
- When cut properly, it appears clean and classic.
A variety of mortise and tenon joints
There are several versions of this joinery. Choose which one is appropriate for your project and skill level.
Blind Tenon
A blind mortise and tenon joint is a mortise and tenon joint where the tenon is hidden in the mortise. No information is displayed on the other side. This is a very common option for furniture, as the final product is clean looking.
Through Tenon
A through tenon extends through the mortise and appears on the other side of the mortise. It provides a decorative detail and additional glue contact.
Haunched Tenon
A haunched tenon is a tenon with a little extra piece at one end. It can be used at the end of the groove on frames, like frame-and-panel doors.
Wedged Tenon
A wedge tenon is a through tenon with small wedges inserted into its end. The wedges fit snugly into the mortise and secure it.
Loose Tenon
Loose tenon is a separate tenon piece that slides into the mortises made in both parts of the tenon. When using a router jig or mortising machine, the quickest way to do this.
Tools and materials you need
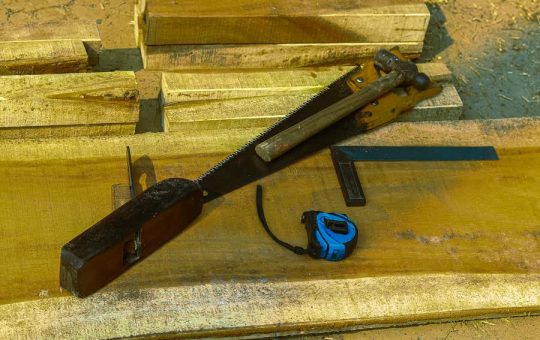
Mortise and tenon joints can be cut by hand or with machines. Most hand-tool operations can be done with these simple tools: Fine Woodworking has a detailed guide on how to cut a mortise and tenon by hand.
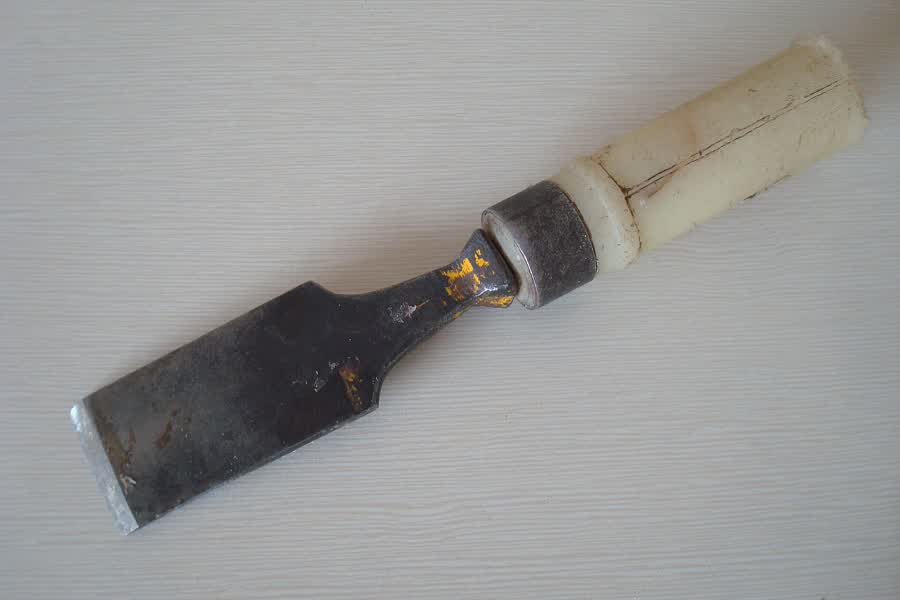
- [‘Marking gauge’, ‘Combination square’, ‘Use a knife or sharp pencil to mark your work.’, ‘Chisels and mallet points are very sharp.’, ‘A backsaw or tenon saw is used for this type of cutting.’, ‘Drill and drill bit’, ‘Wood glue and clamps’]
- Scrap wood – for test cuts.
This can be timesaving using a hollow chisel mortiser, a router or a table saw fitted with a tenoning jig. Hand tools provide greater control and are less expensive.
Use straight, dry and stable timber. Over time, the shrinking of wood with moisture loss can cause the joint to become loose. Oak, maple, and ash are examples of popular hardwoods for furniture. Our guide to hardwood vs softwood furniture explains the differences.
Make a Mortise and Tenon Joint Step-by-Step
Perform the activities in order. If you’re a beginner at joinery, practice on scrap wood first.
Step 1: Plan the Size
The rule of thumb is that the tenon should be approximately ⅓ the thickness of the item. A 3/4″ thick rail receives a 1/4″ thick tenon for instance.
As long as your design will allow, use as much length as possible to get more glue area. A tenon of 1 inch or more is typical on leg and apron joints.
Be sure to leave excess wood in the mortised piece. An extra piece of wood is called a horn. Prevents end split when cutting and clamping, and can be cut off after assembly.
Step 2: Mark the Mortise
Mark from the same face on both pieces. This maintains alignment of the parts. Make a marking gauge equal to the width of your chisel and scribe two lines for the mortise walls. Label both ends with a knife and a square.
Step 3: Cut the Mortise
Bore a line of holes within the lines to cut out most of the waste. A bit about 1/8 of the width of a mortise. Next clean the walls and square the ends with a sharp chisel.
Make the mortise slightly deeper than the tenon, about ¼” to ½”. This small space should allow for additional glue and prevents the tenon from resting against the bottom.
Stop and stay here. Tight mortise and tenon joints are based on a clean, square mortise.
Step 4: Mark the Tenon
Measure the width and place the rail next to the mortise. Measure the thickness of the tenon with a gauge and the shoulders with a knife line. Shade the “waste” side so you don’t cut the wrong portion.
Step 5: Cut Cheeks and Shoulders
The broad face of the tenon is the cheeks. Cut across the grain, on the waste side, to the shoulder line. Then the shoulders were sawed across the grain to take away the waste.
Use a shoulder plane or a chisel to clean off surfaces. Maintain shoulders square. The slanted shoulders create space that makes the joint weak.
Step 6: Test the Fit
Put the tenon in the mortise. It should be pushed in with a good firm hand’s press. If a mallet is required to force it, it is too tight and can split the wood. If it wobbles, it’s too loose.
Shave thin sections from cheeks until fit is tight. A light chamfer is applied to the tenon end so it will slide in.
Step 7: Glue and Clamp
Fit all components before glueing; be sure they are dry. Next, apply wood glue to the inside walls of the mortise, and to the tenon cheeks. Do not leave a large blob in the bottom of the mortise.
Close, clamp and make sure the frame is square. Use a damp cloth to clean up squeeze out. According to the label on the glue, keep the clamps in place for the length of time specified on the label.
Common Mistakes to Avoid
A good mortise and tenon joint will not work when it is made in a hurry. Be alert for the following issues:
- Woodcutting chisels that are not sharp enough to cut solidly.
- A too thin tenon that might break when load is applied.
- Not having to do a dry fit (which does not show up until the glue has been applied).
- Making a mortise too close to the end of the board.
- Using wood that is still damp.
Tips for a Stronger Joint
Little things can have an impact on the end product.
Test on scrap of same species. Various woods compress and cut in varying ways.
Mortise first and then fit the tenon to it. A mortise change is harder to make than a tenon change.
Be sure that the grain of the tenon is parallel to the length of the rail. Short-grain tenons break easily.
Consider drawboring for additional grip. A hole is drilled through the mortise cheek and another hole slightly offset in the tenon and a wooden peg is driven in. Offset tightens shoulder. Drawboring is used to reinforce a mortise and tenon joint.
Final Thoughts
A mortise and tenon joint is a reward for patience. Precision marking, clean mortise, and tight tenon are more important than special tools.
Use a simple blind joint with scrap wood. Test, fit and glue it up. After a few practice rounds, you’ll be able to construct tables, chairs and frames that will last for years. Finish the piece with the best wood finishes for furniture, or try the joint on a simple wooden bookshelf.
FAQs
In which part of the body is a joint found?
It is used to connect parts in furniture, doors, windows and timber frames. Commonly found in table leg to apron joints, chair rails and bed frames.
Which is stronger, a mortise and tenon joint or screws?
Wood frames with good glued and fitted joints will perform better against racking and twisting forces than a frame with only screws. A tenon requires the glue surface to be large, but the mortar walls are used, while screws need not be. Fit, wood quality and good glue work are still the keys to strength.
What is the thickness of the Tenon?
The rule of thumb is that it should be approximately one-third the thickness of the piece. A tenon that is too thick weakens the mortised piece and a too thin tenon can split.
Do I need to use a power saw to cut this joint?
Yes. The marking gauge, chisel, mallet, and saw are all that is needed. Take your time, do your lines frequently and practice on scrap first.
Do I need glue?
Wood glues are most commonly used in most joints of furniture, and a tight fit is most conducive to the glue sticking. Glue is the preferred method of attachment, although drawbore pegs or wedges can provide additional mechanical attachment.